Groups are collections of users. You can Add and Remove groups as present in the external User Source or Internal Group definition.
Note
SavaPage caches group members for performance reasons. Therefore, when group membership changes at the source, it may not be immediately known in SavaPage. The membership cache is updated automatically according to the “Import new users overnight” option in the User Creation section, but can be also be refreshed manually at any time by a push on a button in the same section.
There are three built-in groups:
-
All Users : all users in the system.
-
External Users : all users synchronized from the external User Source.
-
Internal Users : all users created inside SavaPage. See Section 4.11.1.3, “Internal Users”.
After a tap on the button in the main menu this panel is shown. See Section 4.2, “Menu”.
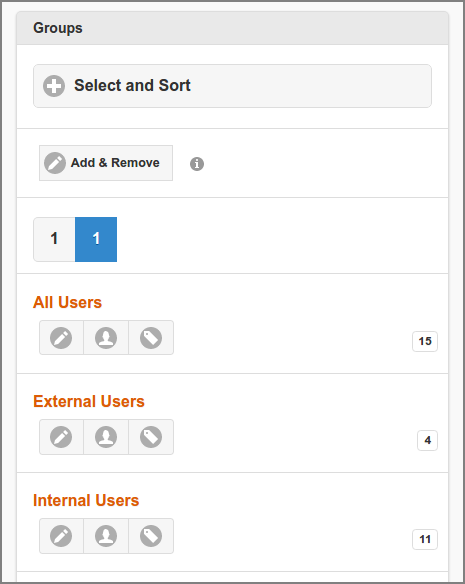
Built-in groups are depicted in orange. Press the button to add additional groups.
Each item in the list shows the number of members and has buttons to jump to other dialogs. From left to right, these buttons bring you to:
-
The Edit Group dialog.
-
The User List with the group preselected. Note: the button is not visible when number of group members is zero.
-
The Account List with the Group Type and Name preselected. Note: the button is not visible when the (lazy created) Group Account is not present yet.
Note
Due to Admin Privileges certain buttons might not be visible. Also, some buttons are not visible if System Status says Setup is needed.
-
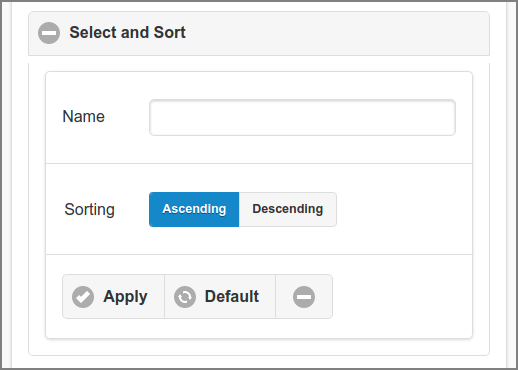
Groups can be selected by entering a part (fragment) of their name.
-
The list can be sorted or on group name.
-
Tap the button to (re)display the list.
-
A tap on the button resets the selection and sort fields to their default values.
-
Use the “minus” button to collapse the Select and Sort section.
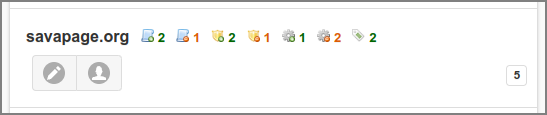
Each Group List Item displays the number of enabled and disabled Group Roles,
User
Privileges and Admin
Privileges objects with their respective icon. A green color
means that the objects are enabled, a red color means they are disabled.
Additionally, the ![]() icon is shown with the number of Shared Accounts the User
Group has access to. A description of the objects is displayed as a tooltip
when pointed to with the mouse. An example item is shown below.
icon is shown with the number of Shared Accounts the User
Group has access to. A description of the objects is displayed as a tooltip
when pointed to with the mouse. An example item is shown below.
Note
Roles and Privileges that are resolved by User Group membership are shown in the User List Item of a member.
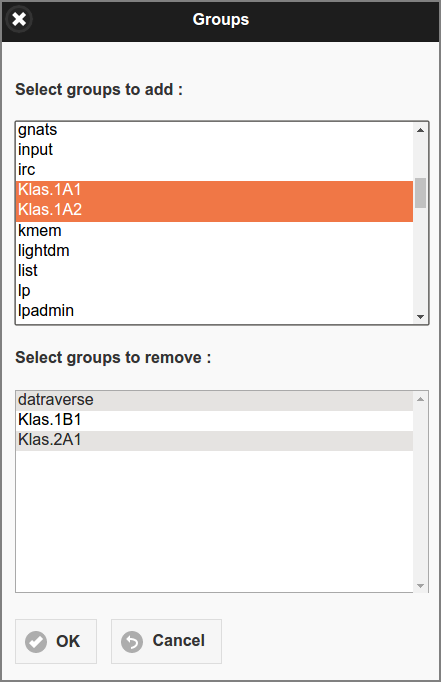
Select the groups to add and to remove and press the
button to commit the selection.
Note
The group list is a mix from the ones present in the external User Source and the ones defined as Internal Group. When adding a user group from Microsoft Active Directory, members from nested groups are included.
The Group Edit Dialog has several sections. Press the button at the bottom to commit all changes.
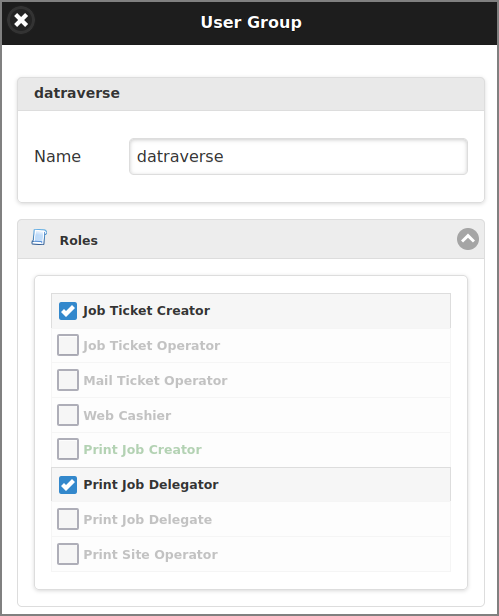
In the Roles section you can set the user roles for group members. See Section 4.4.5.2, “User Roles” for an explanation of the roles and how role based user access works.
Note
A summary of enabled/disabled roles is displayed in the Group List Item. Roles that are resolved by User Group membership are shown in the User List Item of a member.
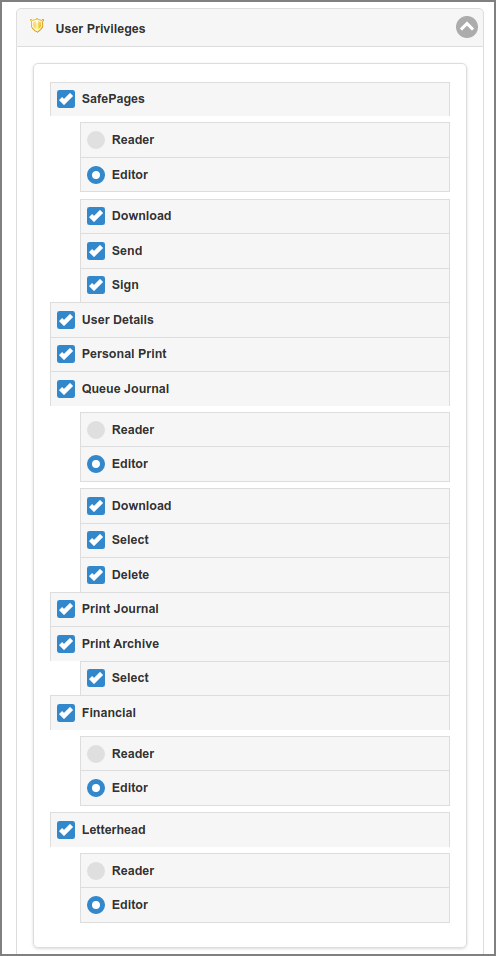
In the User Privileges section you can set group member access to User Web App domain objects. Privileges are set by means three-state buttons. An unselected grayed out button means “indeterminate”, plain unselected means “non-privileged” and selected means “privileged”. When a privilege on a domain object is selected a role like and might be selected, as well as extra actions like , and . The type of Roles and Actions offered depend on the type of domain object. This is how choices work out:
-
If is non-privileged, the
 PDF and
  Sort buttons are not displayed in the Main Page. When privileged:
-
role will display the PDF button if or action is enabled. Reader role will not display the Sort button.
-
role will display both PDF and Sort buttons.
-
If and actions are both disabled the PDF button will not show.
-
Enabled and actions display the respective buttons in the PDF dialog. The enabled action displays the same option in the PDF Security section.
-
-
If is non-privileged the footer button for the User Details dialog is replaced with a simple indicator holding the id of the authenticated user.
-
If is non-privileged, use of Personal Account for printing is not allowed. User can use Shared Accounts though, when permitted by Access Control. When printing with Personal and Shared Account is not permitted, role Print Job Creator is assumed, even when this role is explicitly selected.
-
If is privileged a Print-in Job is journalled. Beware, that this function can be disabled for individual queues: see Section 4.7.2, “Edit Queue”. When privileged:
-
role will show the and privileges.
-
role will additionally show the privilege.
-
Enabled , and privileges will display the respective buttons in the Document Log.
-
-
If is privileged a Print Job will be silently journalled. When is privileged, the Print Job Archive option is active: when is privileged, the user is allowed to (de) select the archive, when not, the Print Job will be silently archived. Beware, that these functions can be disabled for individual printers: see Section 4.8.2, “Edit Proxy Printer”.
-
If is non-privileged, the account balance will not show in the footer, the Transactions button will not show in the Log page, and Financial data will not show in the User Details dialog. When selected, the Reader and Editor role will display all. However, only the Editor role is allowed account transactions in the User Details dialog. Editor role is also required to login to the Payment Web App.
-
If is non-privileged, the
 Letterhead button is not displayed. When
privileged the Reader and Editor role allows user to choose a
Letterhead in the PDF and Print dialog. The Editor role allows users to add
letterheads themselves. See Section 3.6, “Letterheads”.
Letterhead button is not displayed. When
privileged the Reader and Editor role allows user to choose a
Letterhead in the PDF and Print dialog. The Editor role allows users to add
letterheads themselves. See Section 3.6, “Letterheads”. -
The open spots left by buttons that are not displayed are taken by: the Upload button (moved from the footer), a Browse button pointing to the Browser, and an Info button (pointing to the About dialog), in that order. See Section 3.3.2, “Footer”.
This is how a privilege is evaluated on runtime:
-
To be compatible with existing installations the “indeterminate” state for top level group “All Users” is interpreted as fully “privileged”. Of course, privileges can also be set at "lower" group levels. When determining privileges for a domain object, SavaPage looks at the lowest group first, and bubbles up to higher groups till a “non-indeterminate” privilege for the domain object is found.
-
A denial of access due to a privilege takes precedence over any other configuration property.
Note
A summary of enabled/disabled privileges is displayed in the Group List Item. Privileges that are resolved by User Group membership are shown in the User List Item of a member.
In the Administrator Privileges section you can set group member access to Admin Web App domain objects. The objects correspond to the choices in the main menu. Any user with Administrator Role is assigned privileges by group membership.
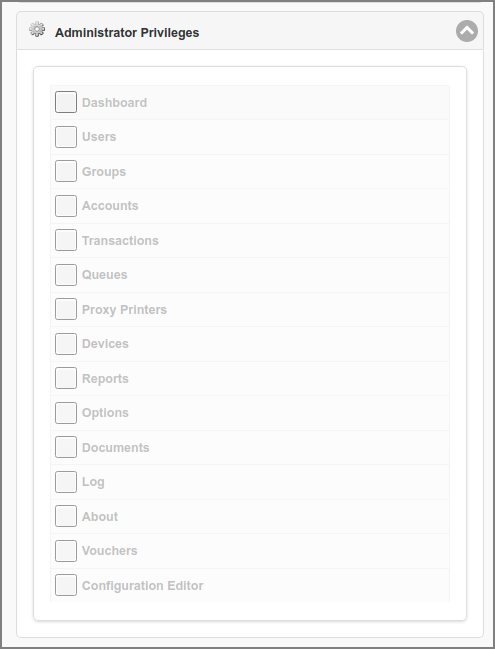
Privileges are set and evaluated by means three-state buttons, just
as User
Privileges. For most domain objects a
and role can
be selected. Access to domain objects will be shown or hidden according to
the privileges.
Note
A summary of enabled/disabled privileges is displayed in the Group List Item. Privileges that are resolved by User Group membership are shown in the User List Item of a member.
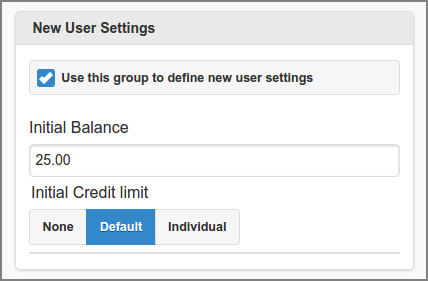
When New User Settings are enabled they are automatically applied upon User Creation for members of this group. Note that these settings do not affect existing user members. See the Financial section of the Edit User dialog for a description of the Balance and Credit Limit fields.
When a user belongs to multiple groups, the New User Settings of these groups is applied as follows:
-
The user is assigned an initial Balance that is the sum of the Initial Balances of all matching groups (with the exception of the Built-in Groups).
-
If any of the matching groups has Initial Credit Limit “None” the user is assigned this status.
-
Since the New User Settings are applied in alphabetical group name order, the Initial Credit Limit “Default” and “Individual” are assigned from the last group.
When a user does not belong to any group with New User Settings enabled, user is assigned the settings of the “External Users” or “Internal Users” Built-in Group (depending on the type of User Source).
Note
New User Settings are not shown for Built-in Group “All Users” because they are never used.