This section is about Shared Accounts as explained in Chapter 12, SavaPage Financial. The accounts are utilized in Delegated Print and PaperCut print scenarios.
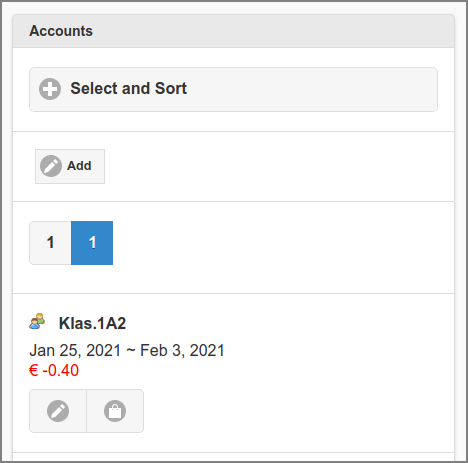
After a tap on the in the main menu this panel is shown. See Section 4.2, “Menu”.
-
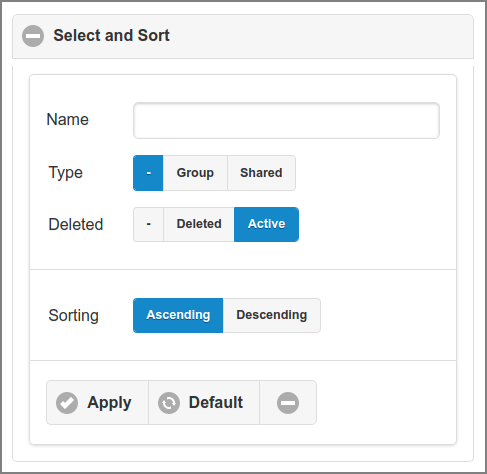
All accounts are listed alphabetically by default. A different selection and sorting can be entered: see Figure 4.54, “Admin Web App: Account - List - Select and Sort”.
-
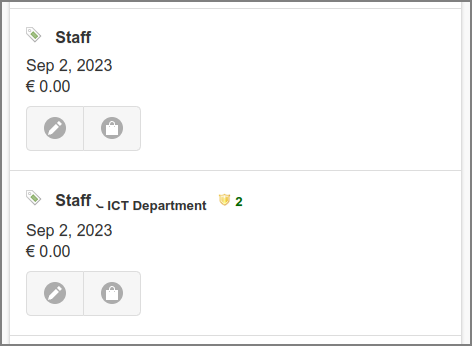
The
 icon signifies a plain Shared Account and
  a Group Account.
 -
Press the button to create and Edit a new Account. Note: the button is not visible if System Status says Setup is needed.
-
The list can be traversed by tapping one of the buttons at the pager at the top or bottom of the page.
-
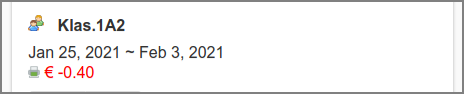
An entry is displayed for each Account, with the account type icon and name, the transaction period and the balance amount.
If PaperCut Personal User Account is enabled, the amount is prefixed with the SavaPage icon, as shown in the screenshot above. -
Parent \__ child accounts are depicted with a subscripted smaller font child name.
-
Plain Shared Account items display a "shield" icon with the number of User Groups (if any) whose members can use the account to charge (printing) costs on (see the Access control section in the Edit Dialog). The group names are displayed as tooltip when pointed to with the mouse.
-
Tap the button to change or delete the account. See Section 4.6.2, “Edit Account”.
-
The button brings you to the list of transactions. This list has an identical setup as the one for User Account transactions: see Section 3.8.2, “Transactions”.
Note
Due to Admin Privileges certain buttons might not be visible.
-
Accounts can be selected by entering the containing text (fragment) of their Name.
-
Select the Type and Deleted Status. The button will select both option values.
-
The list can be sorted or on Name.
-
Tap the button to (re)display the list. A tap on the button resets the selection and sort to their default values. The minus button collapses the section.
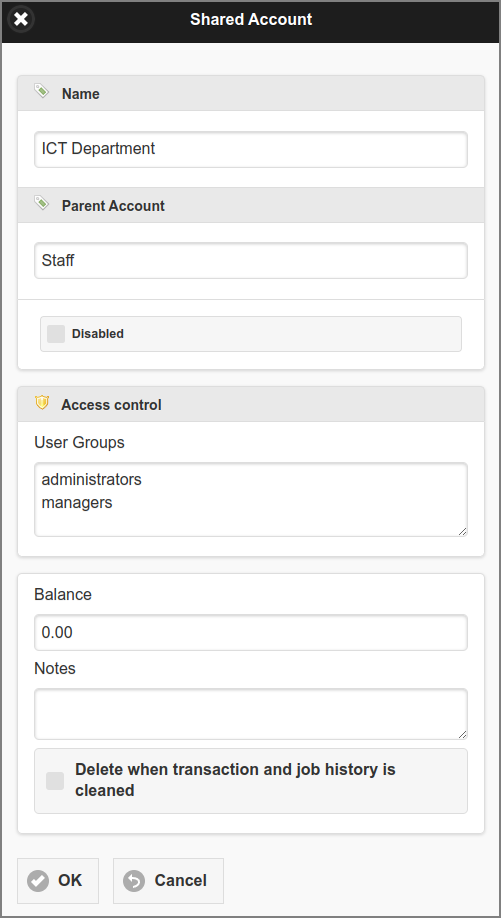
Group Accounts are ad-hoc created in the Delegated Print scenario, and have names identical to their User Group. Editing of Groups Accounts is limited to Balance, Notes and the option. Shared Accounts can be freely created, and can fully be edited as explained below.
-
The Name must be case insensitive unique for parents and for children within a parent. For instance, the following
Parent\Childname combinations can coexist:A\C,B\C,C\C. Shared and Group Accounts have different name spaces, so account name “A” can exist as Shared and Group Account. A "." (point) character can not be part of an account name. -
Group Accounts cannot act as Parent Account. Therefore the Parent Account must be a Shared Account.
-
An Account that acts as Parent Account for other accounts can have no Parent Account itself.
-
In the Access control section names of User Groups can be entered, whose members can use this account to charge (printing) costs on. See Section 3.5.5, “Print Job Settings” and Section 3.5.8, “Delegated Print Edit”. The number of User Groups is displayed with a "shield" icon at the item in the Account List.
-
A new Balance value results in a financial transaction that corrects the previous account balance. See Section 3.8.2, “Transactions”.
-
Tick the checkbox to delete the Account. This will be a logical delete as long as transactions are present. Any logical deleted Account will be physically deleted from the database when no related transactions are present anymore. This situation will automatically occur when you enabled automatic backup in combination with the delete of old account transactions. See Section 4.11.13, “Backups”.
-
A delete of a parent account cascades to all of its child accounts. An un-delete does not.
-
-
Press the button to commit the changes and return to the Account List.
-
The button brings you back to the Account List without changing anything.